Figure Machine
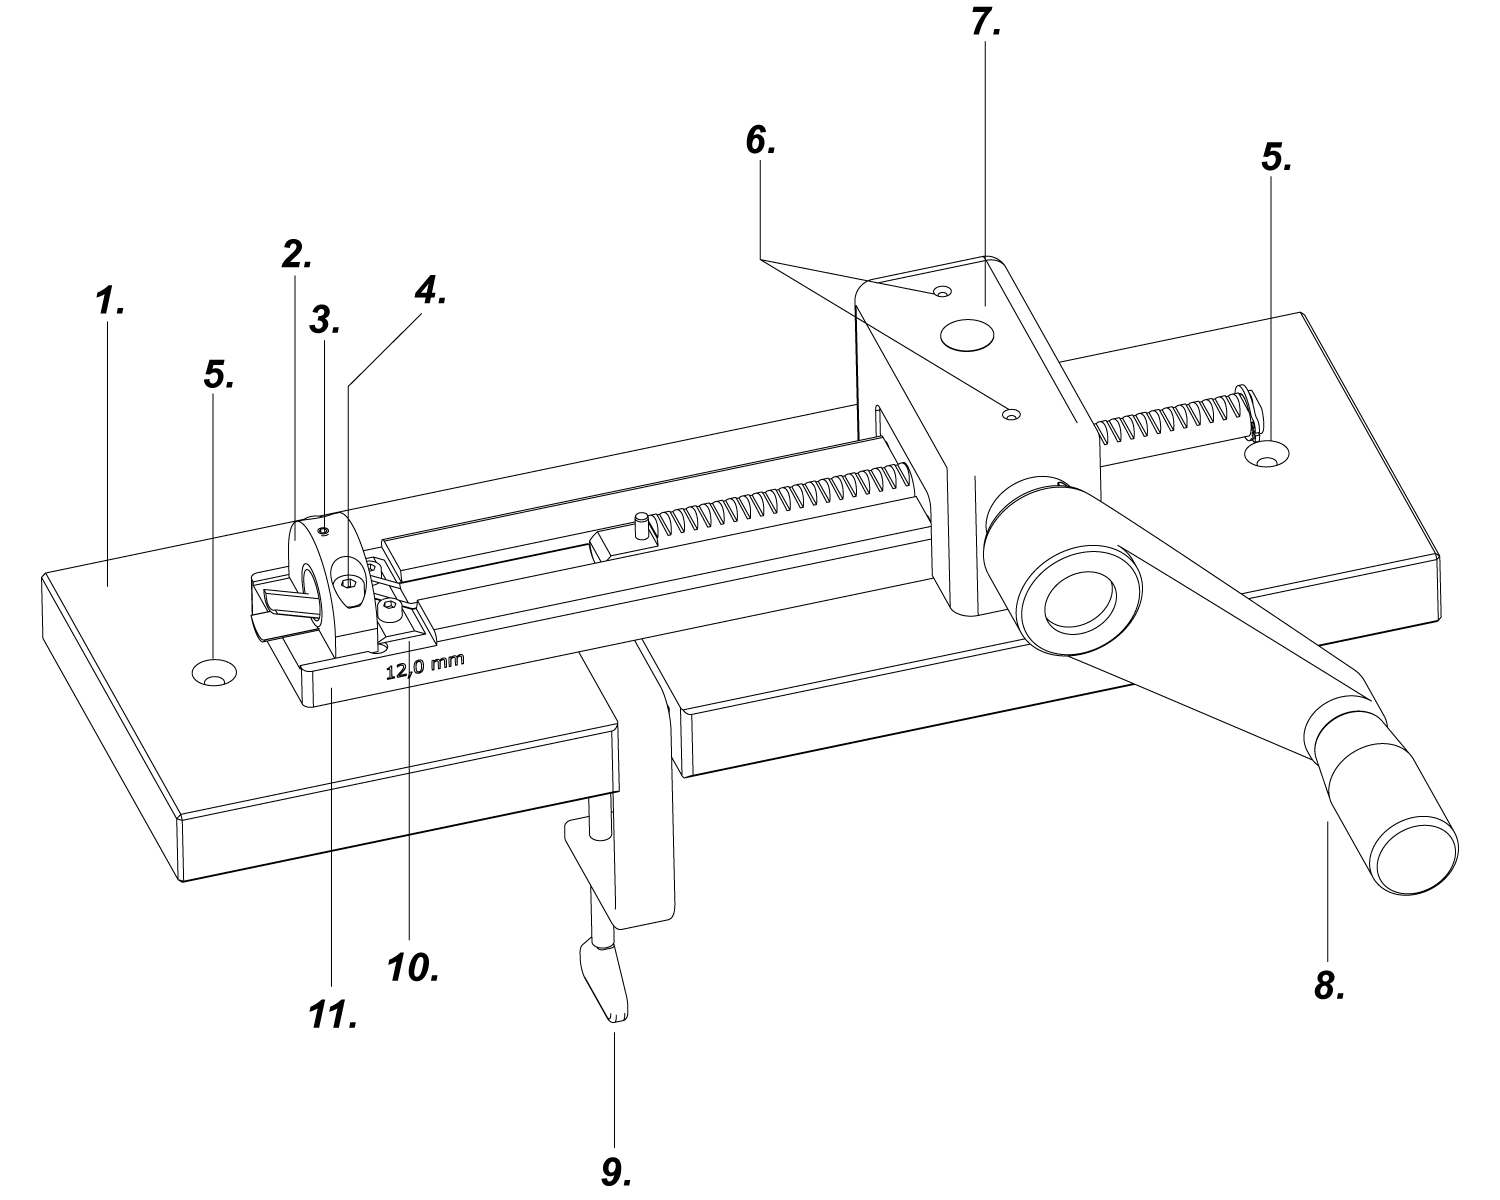
1.
Wooden base
2.
Holder for cylindrical blade
3.
Locking screw for cylindrical blade
4.
Screws for holder for cylindrical blade
5.
Screwholes for fixing the machine on a workbench (if needed)
6.
Oil holes
7.
Gearbox
8.
Crank
9.
Clamp
10.
Side Trim Blade
11.
Bed
Figure Gear Box
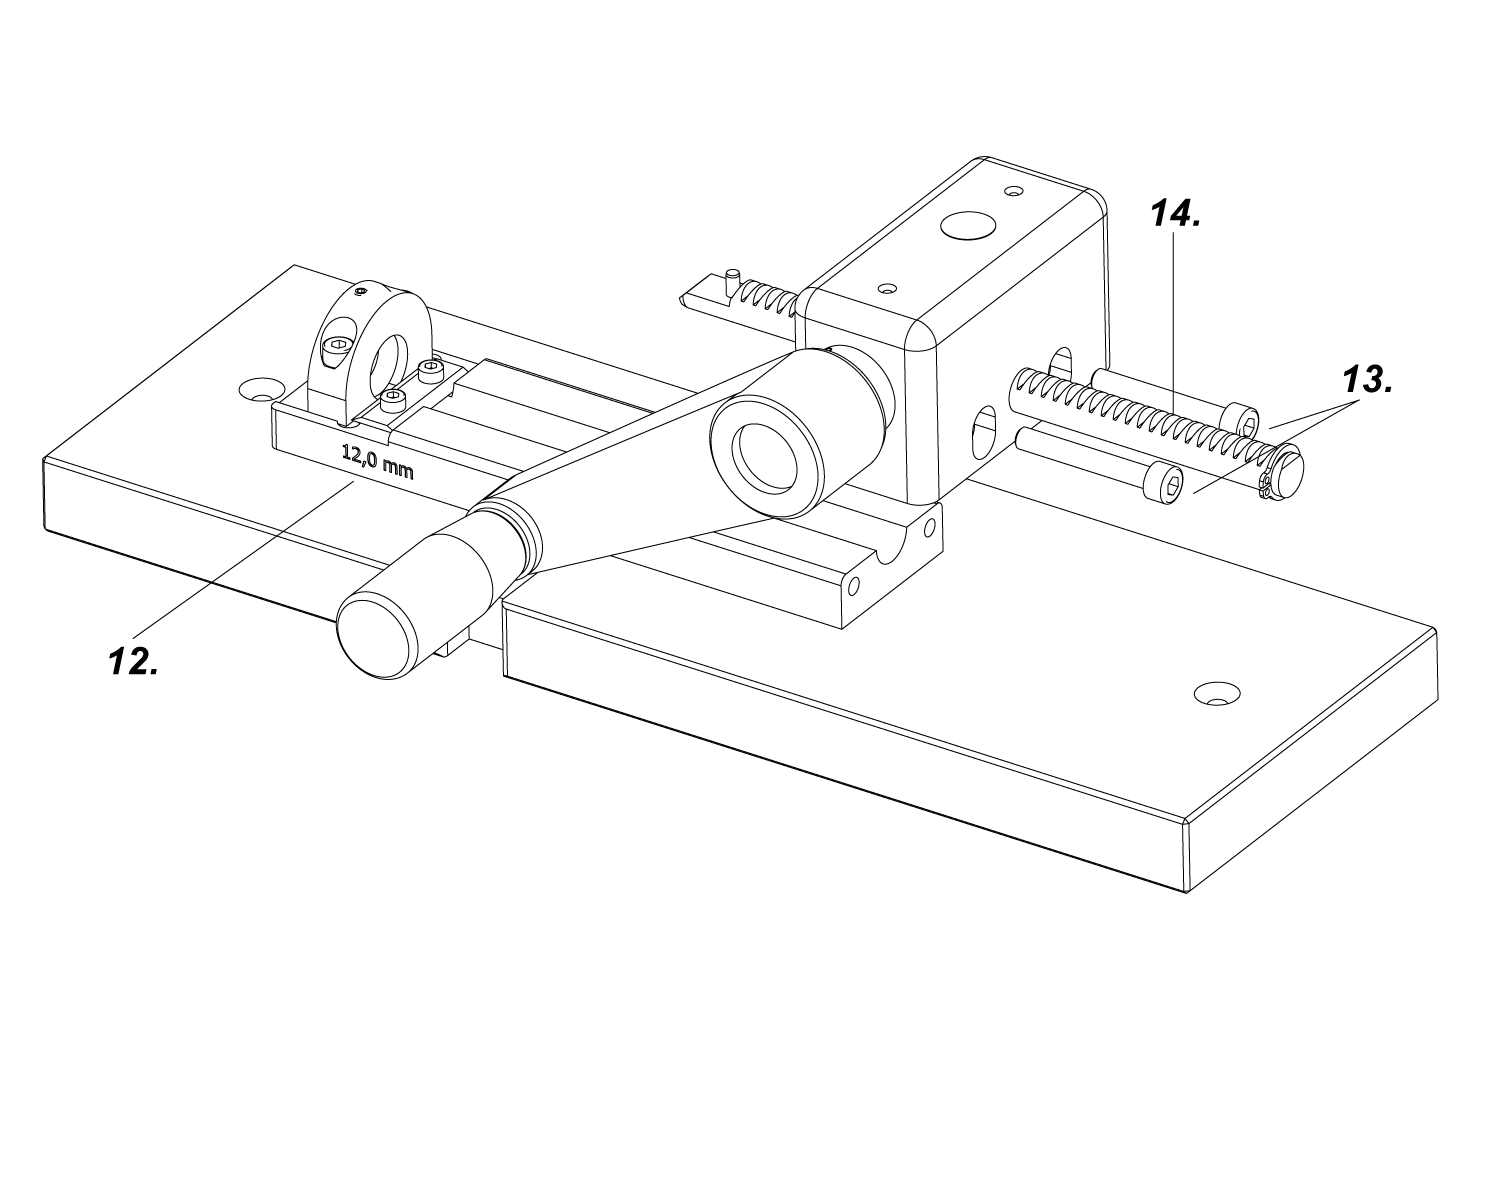
12.
Bed diameter
13.
Screws for Gearbox
14.
Gear rack
Figure Blade Unit
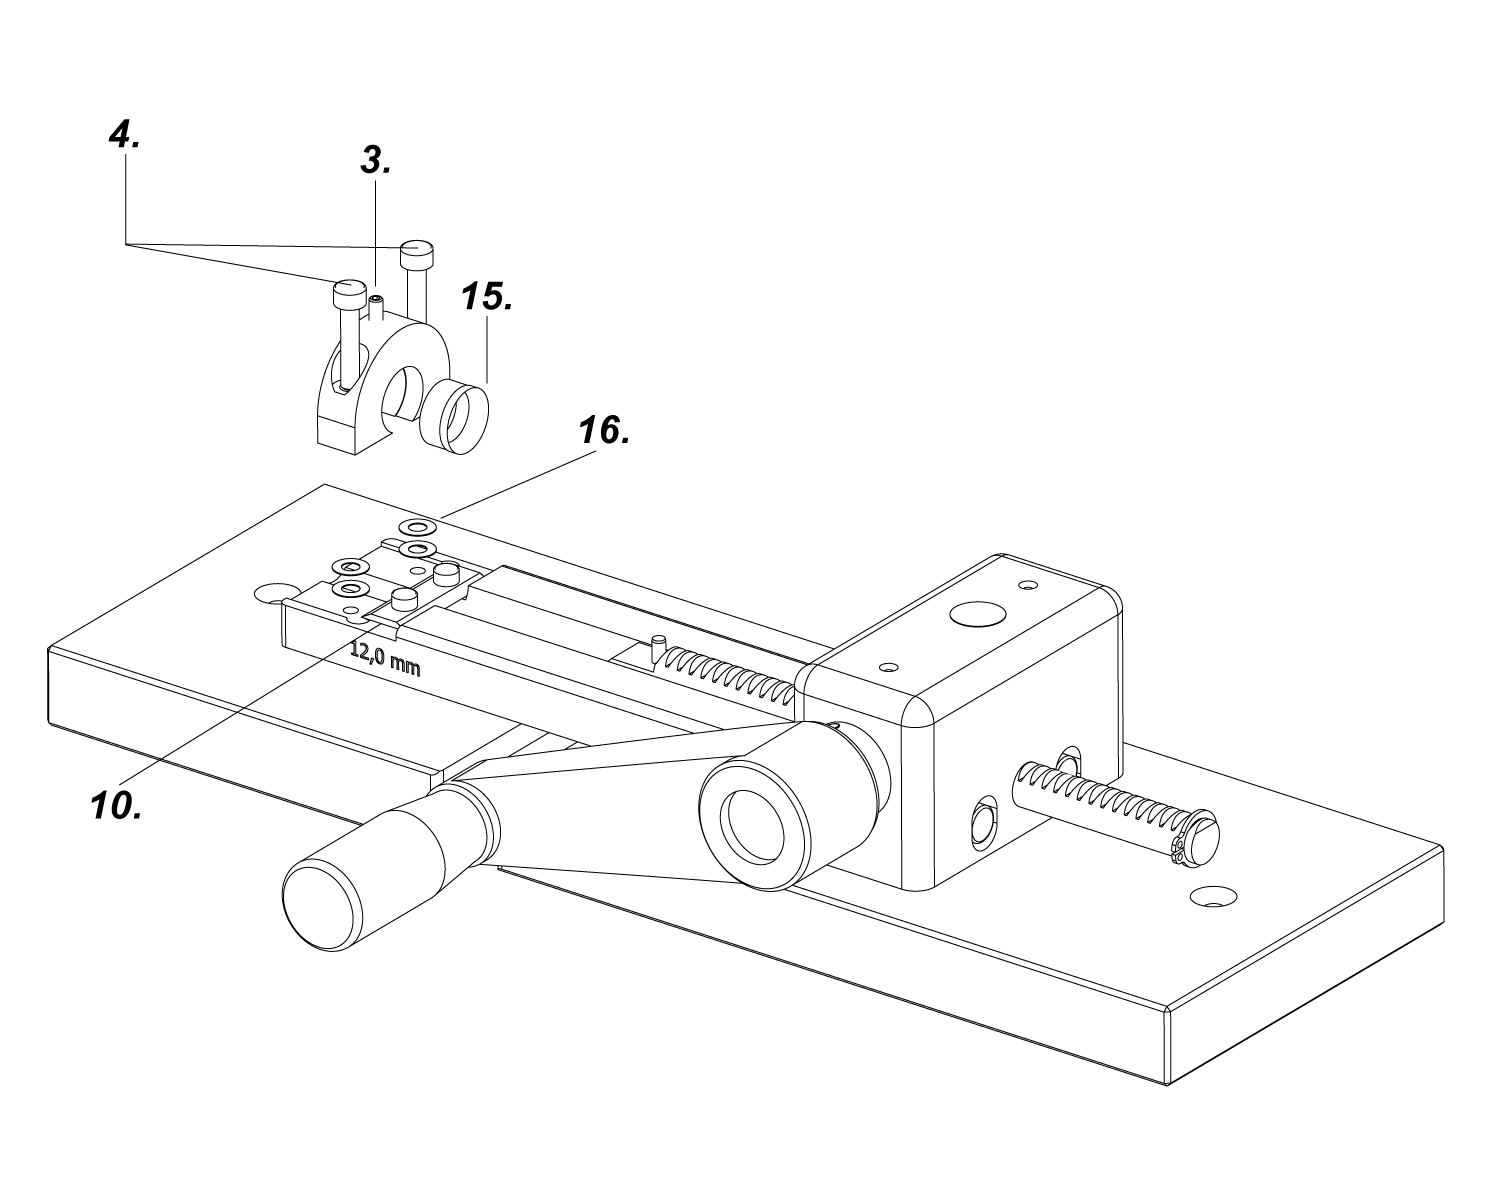
3.
Locking screw for round spare blade
4.
Screws for holder for round spare blade
10.
Side Trim Blade
15.
Round spare blade
16.
Shim rings
Gouging
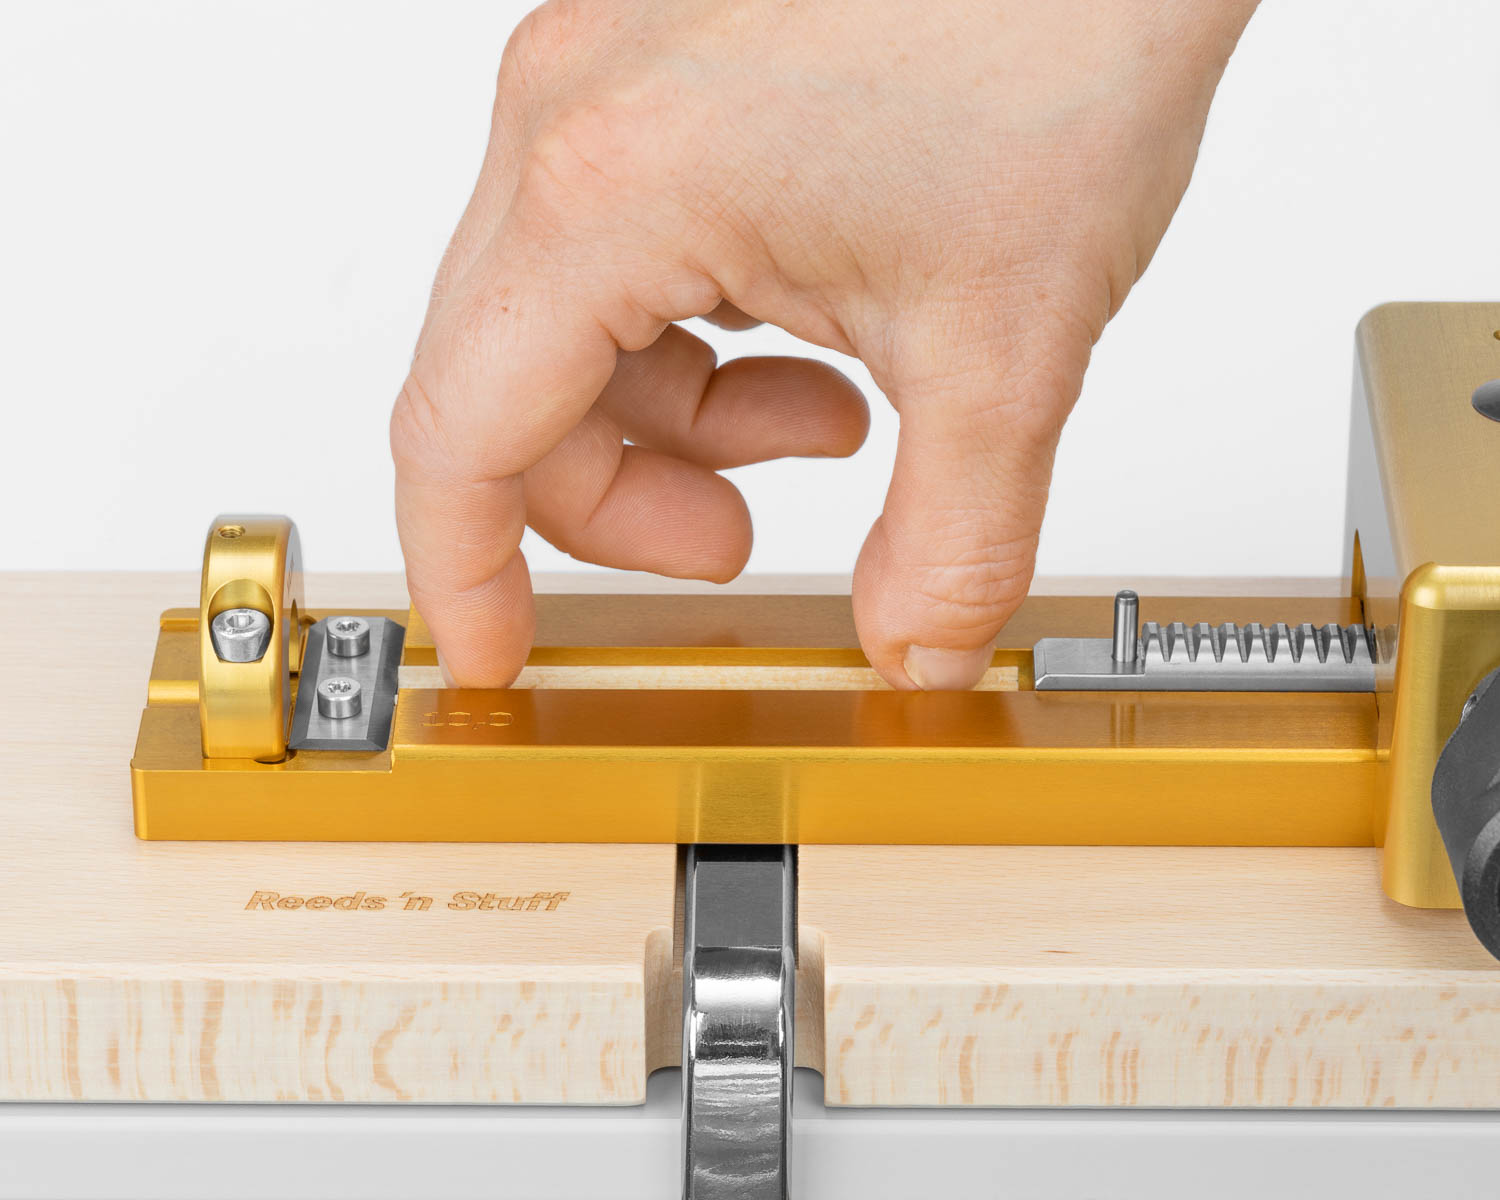
Place the cane into the Gouging bed of the machine. Press down, applying most of the pressure on the left end (near the blades) and turn the crank clock wise. This is very important in order to obtain good results. Other wise, the results may be unpredictable. Once the cane is fully under the first blade, let up on the crank momentarily so you can push the other (right) end down fully into the bed, and then resume. (This last step may sound a bit unnecessary, but plenty of goodlooking cane isn’t as perfectly flat as we imagine it to be.)
Continue turning the crank until the pushrod reaches its limit. Then reverse the crank and load the next piece, which will eject the first one, and repeat the above process. Please do not try to pull out the last piece due to risk of injury. Instead, push the last piece out with a pregouged piece of cane.
Changing the Gouging Thickness
We recommend a thickness of the pregouged cane not less than the following:
Oboe: 0.75 mm
Oboe d'amore and Viennese Oboe: 0.85 mm
English Horn and Baroque Oboe: 0.95 mm
Remove the screws for the round blade holder and lift it off of the pregouger.
As needed:
add washers = thicker gouging
remove washers = thinner gouging
(Important: be sure to use an equal number of washers on both sides!)
Fasten the round blade holder with the screws, and then tighten the blade-fixing screw.
Please make sure that the blade is inserted fully into
the round blade holder. This will avoid potential damage to the round blade.
Replacement of the Round Blade
Unscrew the round blade holder screws and loosen the blade-fixing screw.
Insert the new blade. Fasten the round blade holder with the inserted blade with screws for the round blade holder and then tighten the blade-fixing screw.
Please make sure that the blade is inserted fully into the round blade holder.
This will avoid potential damage to the round blade.
When the Round Blade is dull and has to be rotated
Unscrew the round blade holder screws and then loosen the blade-fixing screw. Rotate the round blade in order to reach the closest unused area. Fasten the round blade holder with the rotated blade with the screws for the round blade holder and then tighten the blade fixing screw.
Please make sure that the blade is inserted fully into the round blade holder.
This will avoid potential damage to the round blade.
Inserting a new Spare Blade
Loosen the two spare blade mounting screws, open the blade-fixing screw and remove the blade.
Mount the new blade with the mounting screws, and then tighten the blade-fixing screw.
Modification of the Machine by changing its Bed
(e.g. from oboe to english horn)
In order to modify the machine by replacing the bed, loosen the two gear mounting screws. The gear unit can then be removed. The brass pusher must be tightly positioned on the gear block. Place a piece of paper into the replacement bed under the brass pusher and fix the gear box on the bed with the two mounting screws. Remove the paper from under the brass pusher and carefully check whether the brass pusher scratches or grinds the gouging bed. If it does, please use two layers of paper during assembly.
Maintenance
Please clean the machine after use and oil frequently. Oilholes (6) are on gearbox.
Safety Instructions
Please always be careful while using your pregouging machine. The blades used in our machines are very sharp and may cause in juries and other damage. Also, the processed cane can sometimes develop very sharp edges, which can lead to injuries. In order to avoid negative consequences, you should follow the following safety instructions during installation, usage and maintenance of your machine:
The pregouging machine is not a toy. The device is therefore not to be used by persons with limited physical, sensory or mental abilities (including children).
You must secure the machine to the working surface with cane screws or a table clamp. The machines must be lubricated regu- larly, especially after processing wet cane. (The oil holes are in the gear cover.)