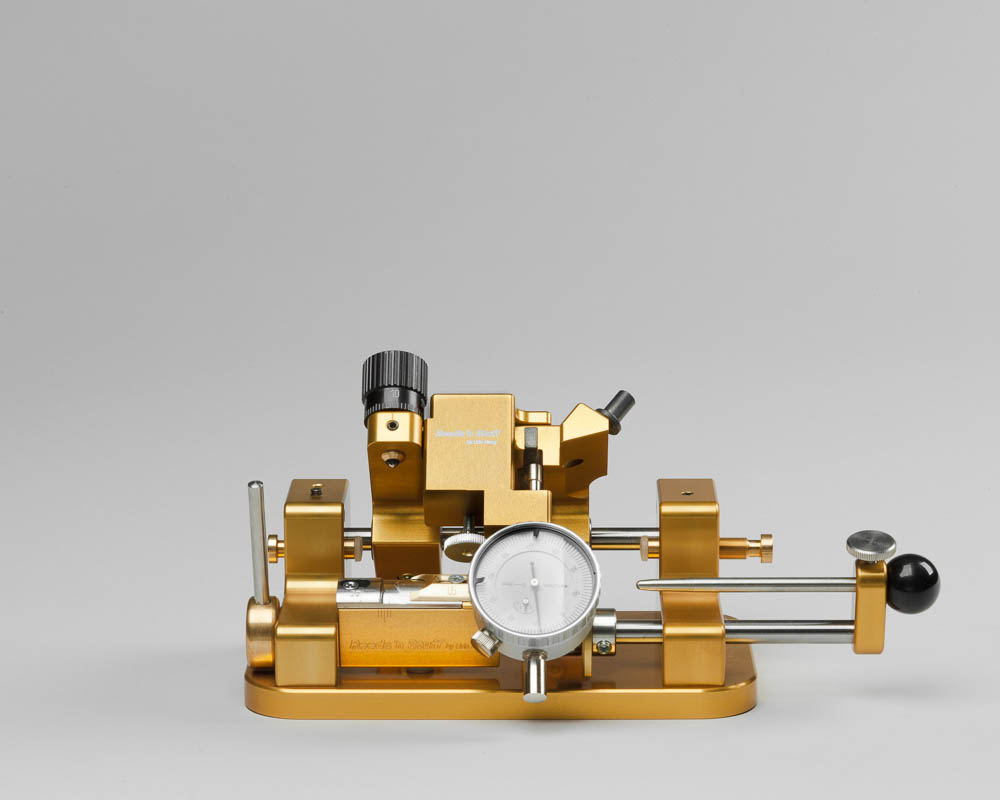
Dial it in
Simply adjust the blade of your Profiling Machine with our new Blade Adjustment Indicator.
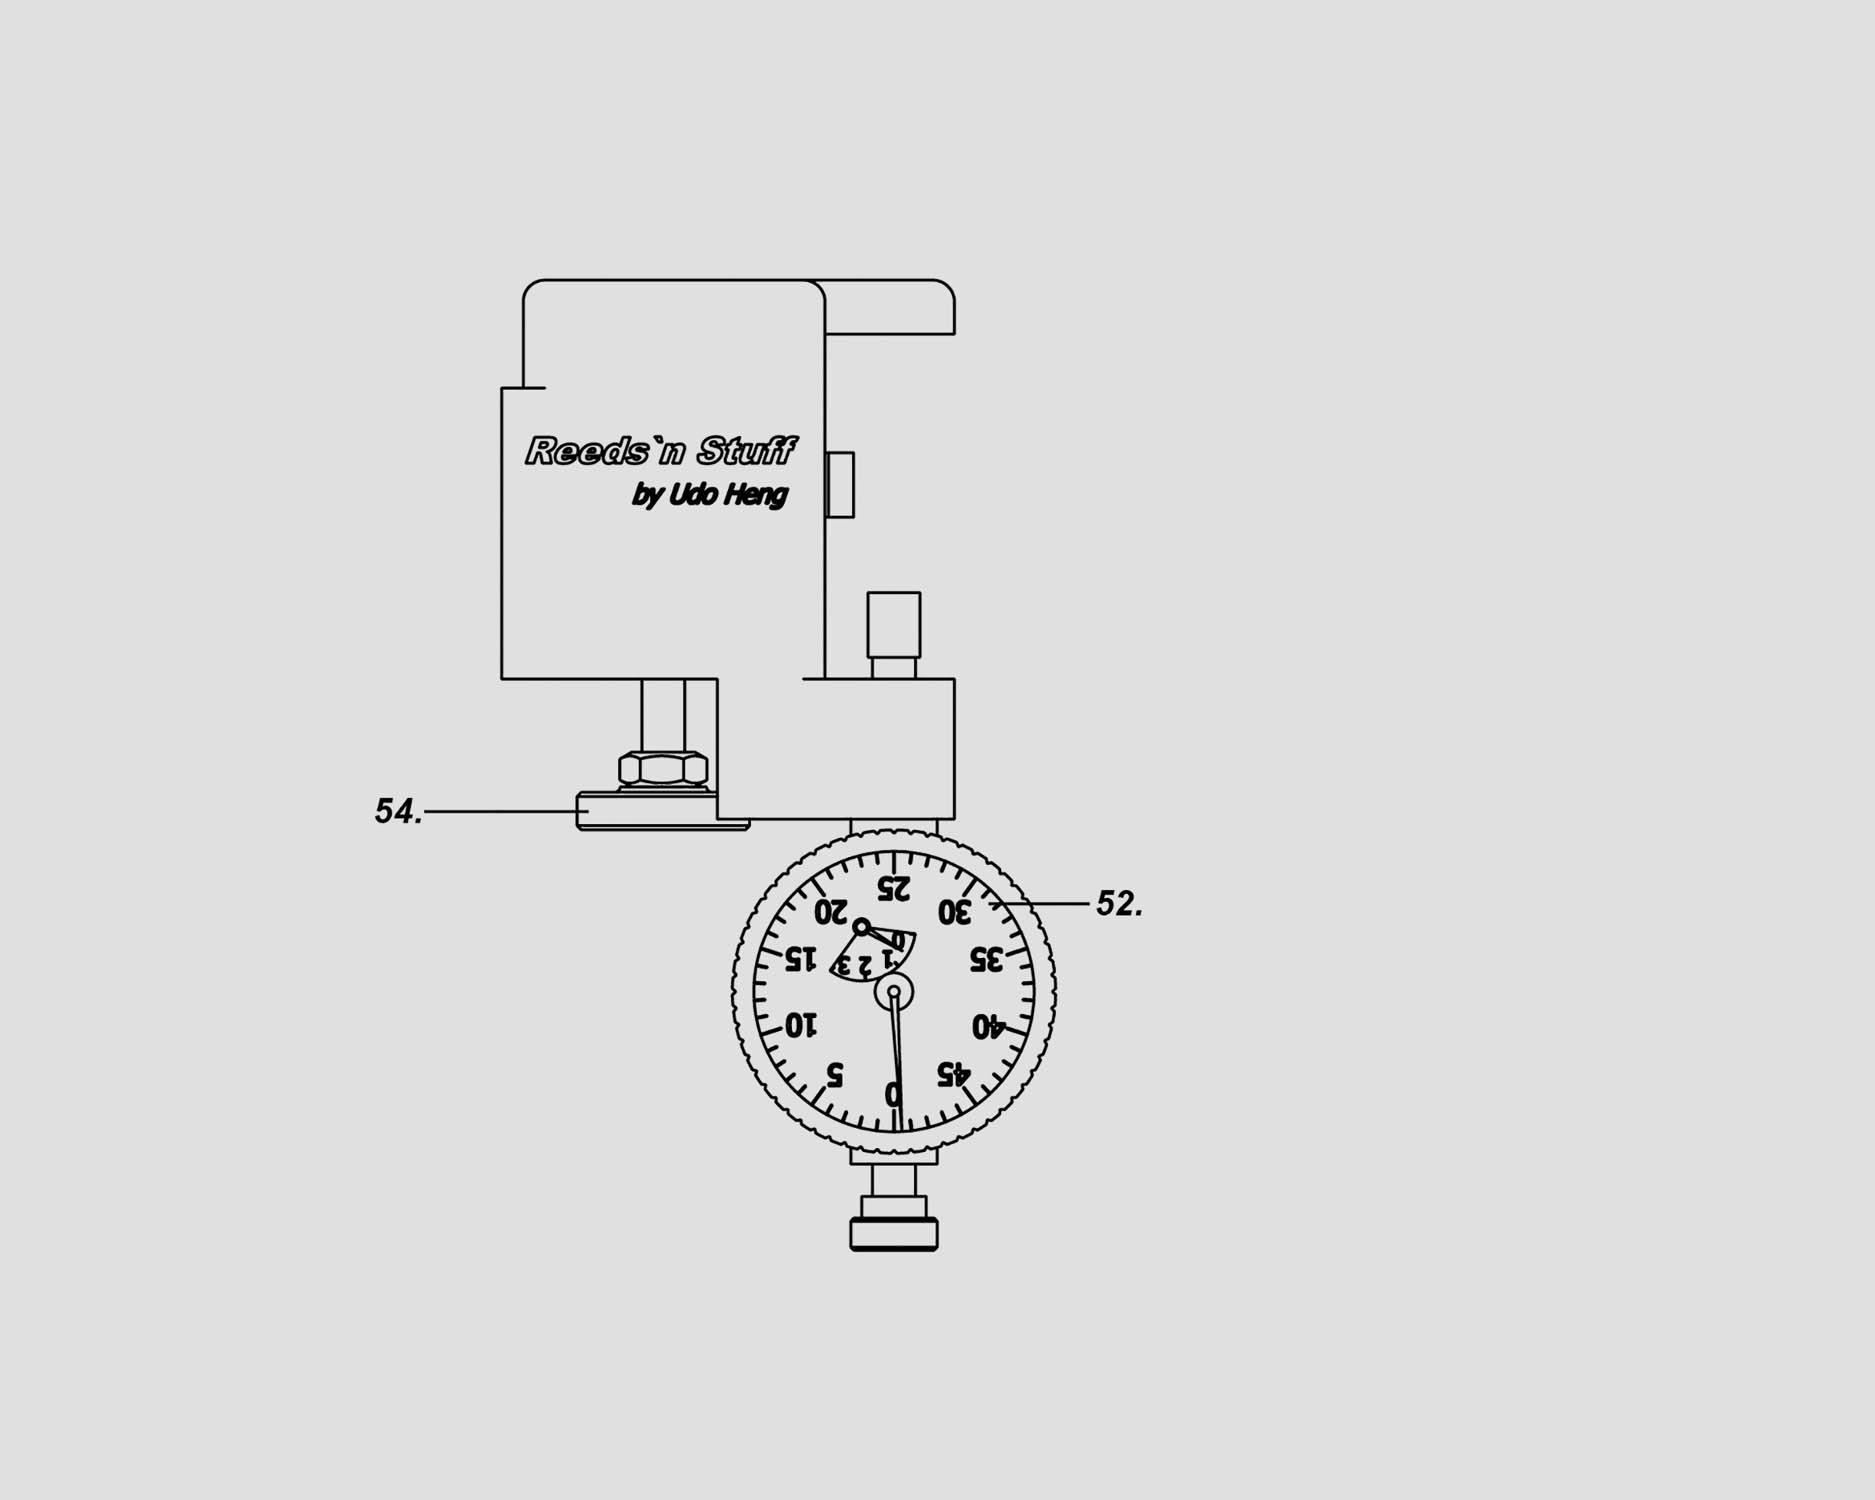
52 Clock Face
54 Srew
57 Measuring Pin
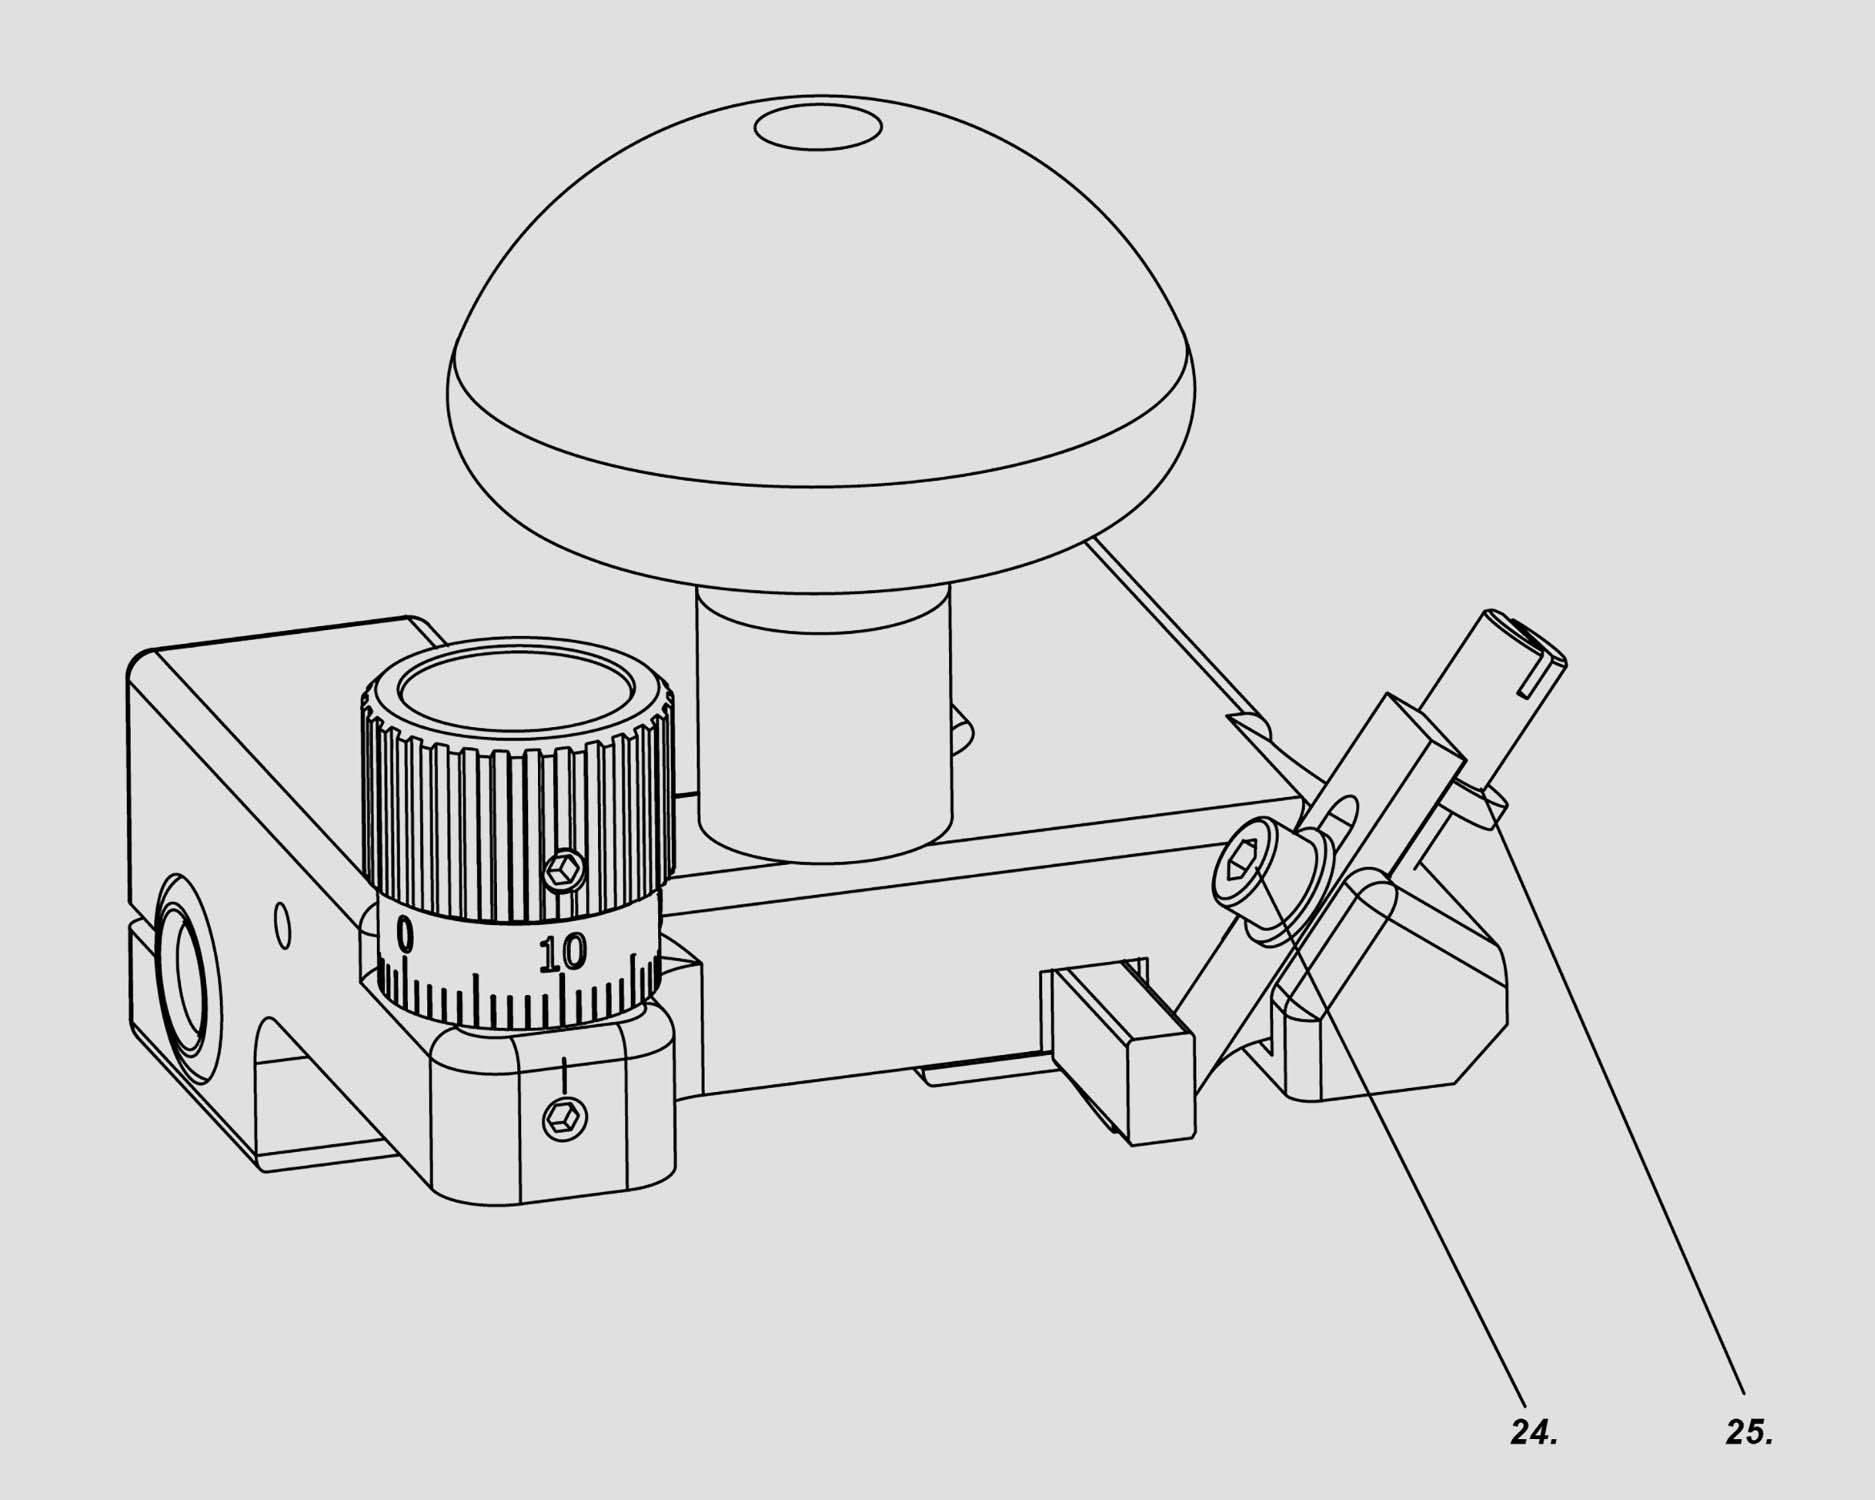
24 Blade Set Screw
25 Blade Adjustment Srew
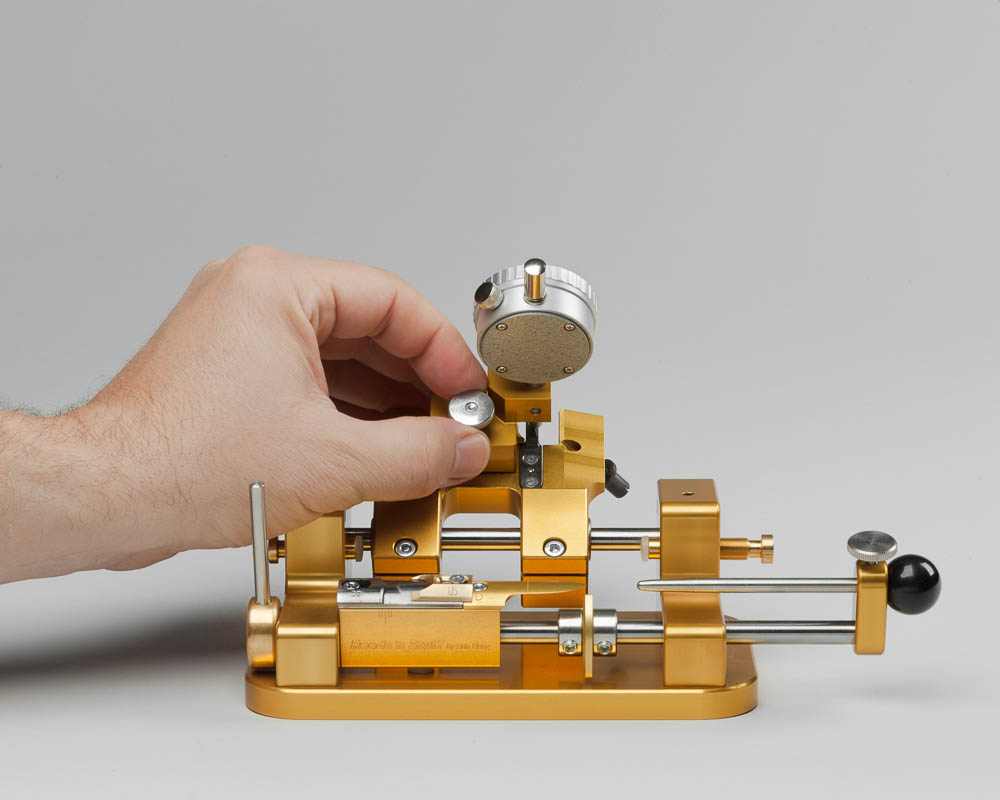
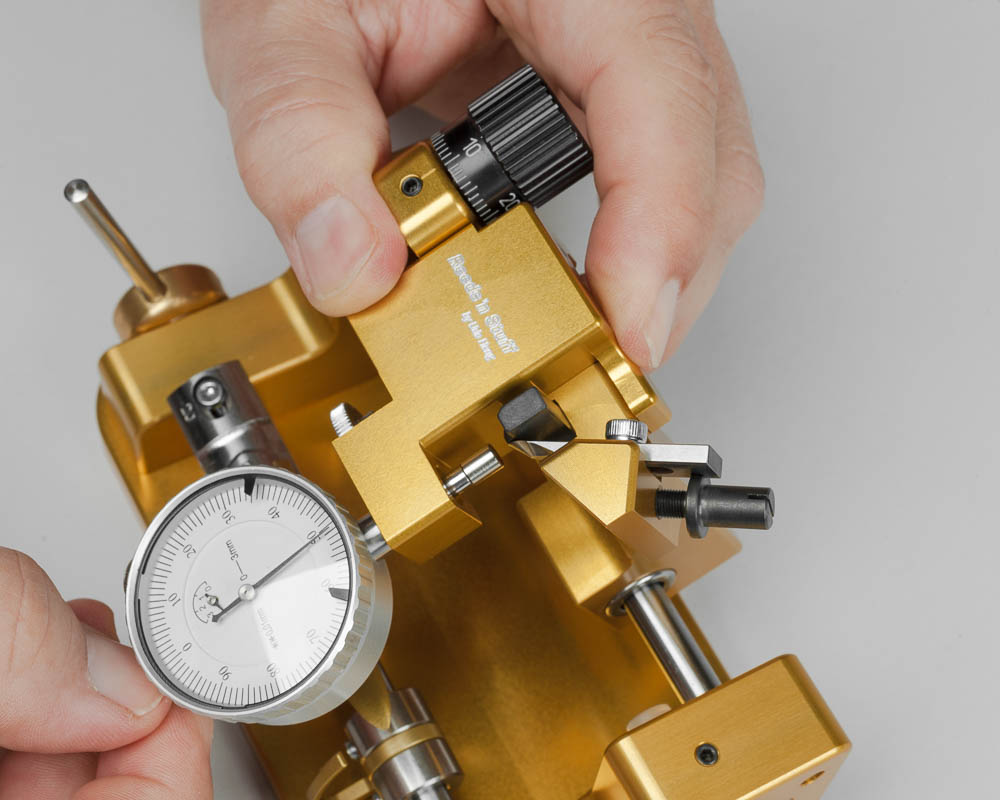
Before you begin, remove both the wooden handle and the blade. Then fit the dial indicator over the carriage as pictured.
Tighten the large screw on the dial indicator to secure it.
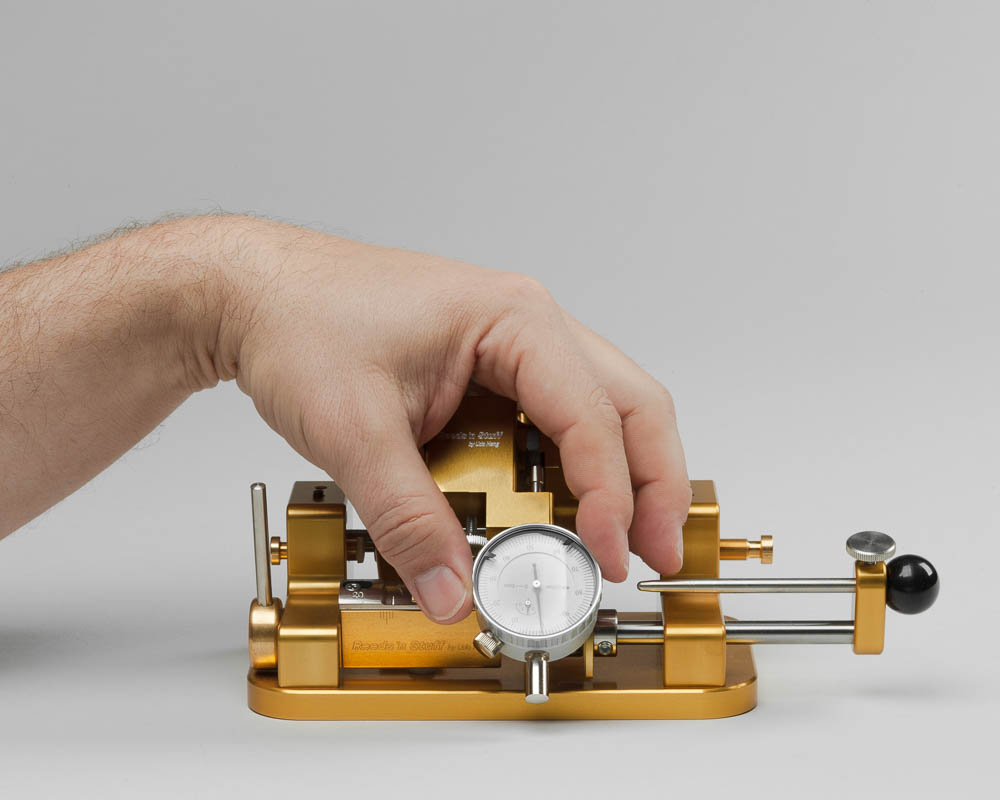
Rotate the clock face as needed to set the dial indicator to zero.

Place the blade on the carriage as pictured. As you slide the blade into place, the slot the side should fit with the corresponding ledge on Screw #25. At this point it is important to confirm that the blade does not protrude beyond the black depth stop.
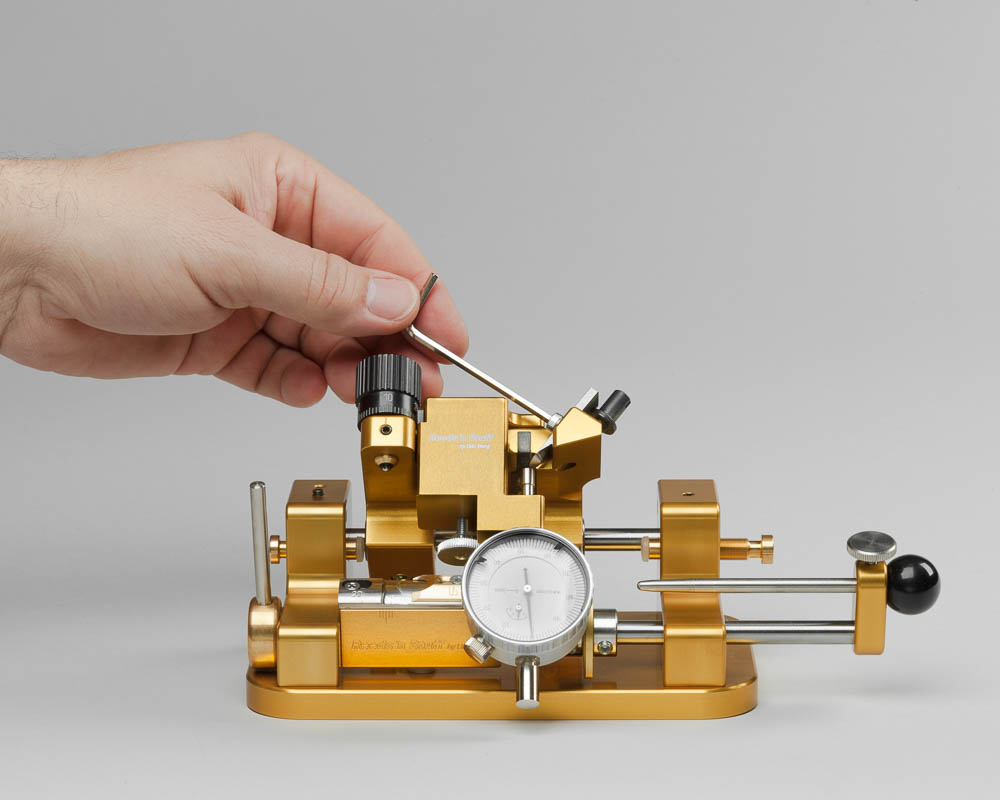
Tighten Screw #24 all the way, so that the blade is held completely in place. Then gently loosen it by less than a quarter of a turn, until the blade is held securely but can be moved by turning Screw #25.
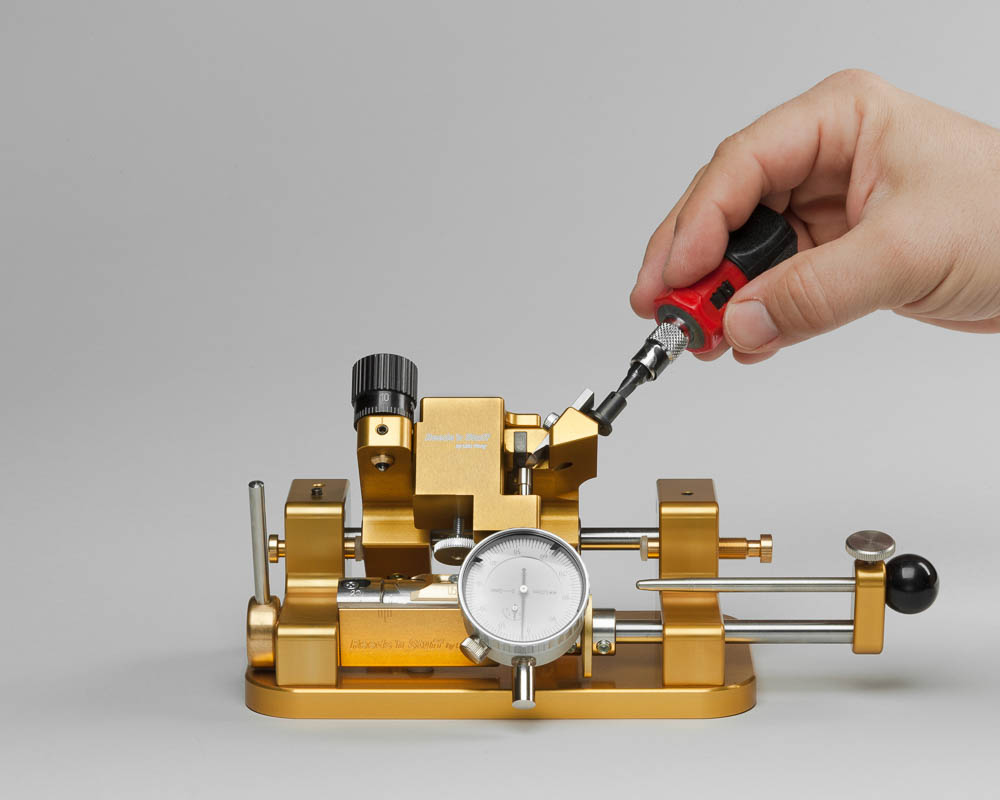
Turn Screw #25 until the dial indicator reads precisely 2.5 to 3 hundredths of a mm (=0.025-0.03 mm) . At this point, the blade depth will be set appropriately.
Tighten screw #24 all the way. The machine is now ready to use. Before you start using the machine make sure the blade does not touch the tongue. See instructions in chapter: thickness adjustment.
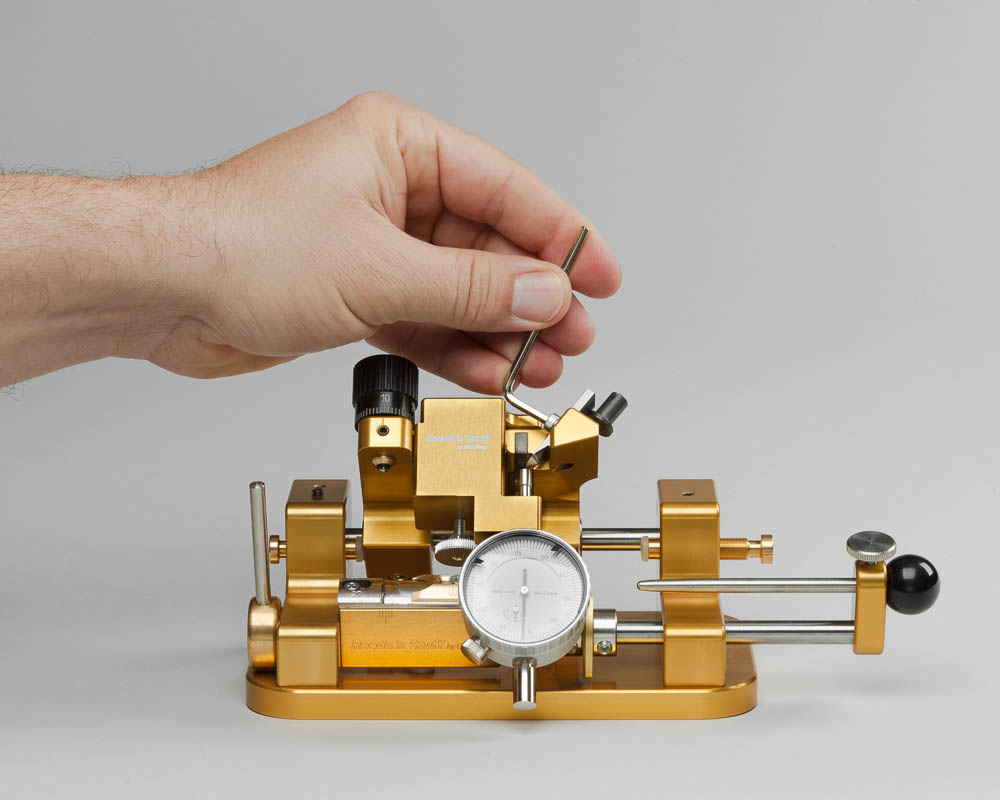
As you remove the dial indicator from the carriage, be sure to pull on the axle of the dial indicator as shown to avoid any damaging contact with the blade.
- Height
- 10.8 cm
- Width
- 5.7 cm
- Depth
- 3.5 cm
- Manufacturer
- Reeds 'n Stuff
- Country of origin
- Germany
- Product number
- F11-13200F11-13200