
全体図
調整中
削りユニット部の図
調整中
マシーンの使用手順
ケーンのセット
①木のハンドルを持ち、削りユニットをベッドと反対方向に浮かせる
②2つの角クリップを外側に軽く押し、ケーンホルダーを浮かせた状態でロック
③ベッドレバーを押し、ベッドを広げながらケーンを置く
④ケーンを慎重にセンタリング後、ベッドレバーを押すのをやめ、ベッドを固定
⑤2つの浮いているケーンホルダー外を側に動かし、角クリップを解除
⑥刃が接触しないよう注意しながら、木のハンドルを持ち、削りユニットをケーンの真ん中に置く
ガウジングする
①木のハンドルを軽く持ち、削りユニットを浮かせず(しかし押し付けず!!)に、右側の端にスライドさせる
※スライドできない場合、車軸にある2つの安全用チューブを取り忘れている可能性があるのでご確認下さい
②上記①と要領で左側の端までスライドさせ削る
※均等に削るために、必ず端から端までスライドさせてください
③上記①と②を繰り返し削れなくなるまでガウジングする
重要な注意!
押し付けてガウジングしてもさらに薄くはなりません。それどころか刃とマシーンを損傷させます。 思うような厚さにならない原因は、ケーンの直径がベッドに合っていない、ケーンが曲がっている場合がほとんどです。
ケーンをマシーンから外す
ケーンの両端にセンターの印を書いてから外すと、シェーピング時など役に立ちます
①木のハンドルを持ち、削りユニットをベッドと反対方向に浮かせる
②2つの角クリップを外側に軽く押し、ケーンホルダーを浮かせた状態でロック
③ベッドレバーを押し、ベッドを広げながらケーンを取る
厚さの調整方法
まずマシーンの下(底)にあるベッドを固定している2つのネジを緩めます。ベッドを左右にスライドさせ、目盛りの「薄い」「厚い」を参考に、好みの位置に移動させます。その後、最初に緩めた2つのネジを締め固定するだけで設定が完了します。
一度に削る量の設定方法
削りカスの厚さを調整するには、ケーンホルダー(ケーンを押し当てる部品)の左側にある奥のネジを回します。このネジは刃の方に伸びており、真鍮のリミットバーに押し付けられています。このネジを締めると削りカスは薄くなり、緩めると削りカスは厚くなります。 少し回すだけで削りカスの厚さは大きく変わります。 キャリパーで削りカスの厚さを測定しながら調整することをお勧めします。
また調整する際に、刃とケーンホルダー(ケーンを押し当てる部品)の間の距離も考慮する必要があります。約1.5mmの距離を推奨しています。
Rotating the Blade
If the blade is becoming dull, loosen the screw at the top of the carriage. This will allow you to rotate the cylindrical blade to a new position that is still sharp. Insert the screw into one of the pre-drilled holes and tighten before continuing gouging.
交換セット
センタリングの再調整方法
このガウジングマシーンは、何らかの理由でセンタリングが崩れても、マシーンの車軸をベッドと正確に平行にすることで、再度センタリングできるように設計されています。
調整方法
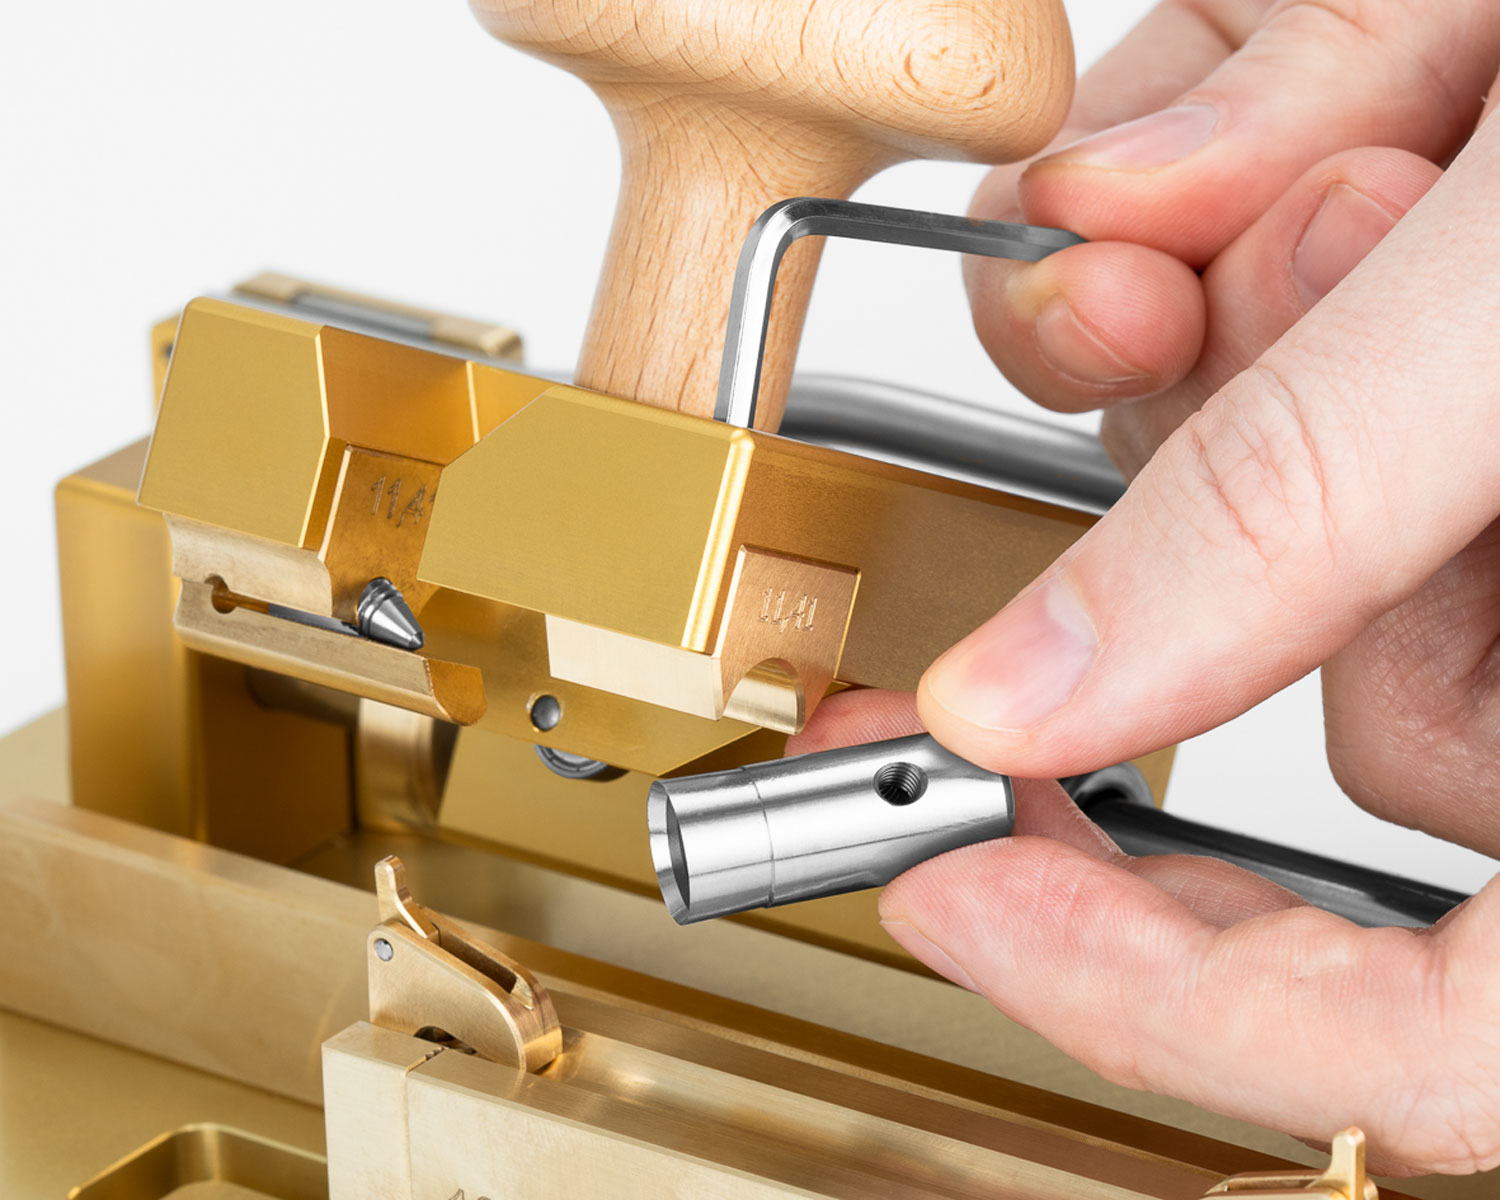
削りユニットをベッドの一番端に置きます。マシーンの車軸を固定している部分の上にある固定ネジを、一番大きな六角レンチで緩めます。次に、削りユニットがあるところと同じ部分の側にある2つのネジを六角レンチで、次のようにネジを回し位置を調整します:
反時計回り: Blade moves away from the axle = thinner gouge on the side of the cane opposite the axle.
時計回り: Blade moves towards the axle = thinner gouge on the side of the cane
nearest the axle.
This process is the same, and needs to be repeated, at each end of the cane bed. When adjusting the position towards the right end of the bed use the adjustments screws at the right end of the machine, and vice versa.
After ensuring the blade is centered, tighten the top set screws on the towers.
重要!
再調整後は刃の滑り具合を確認してください。
また絶対にベッドの端に刃が食い込まないようにしてください!
調整後のチェック
To check if the blade is centered, fully gouge a piece of cane. Before removing the cane from the bed, take a pencil and draw on the cane making sure to cover the entire surface.
Tip: also be sure to mark the center at each end of the cane to help align the cane later.
Remove the cane, rotate the same piece so the end that was on the right-hand side is now on the left-hand side and place it back onto the cane bed. Take another pass with the blade carriage.
If the pencil marks are removed only on the side closest to the axle, then the blade will need to be adjusted further away from the axle using the steps described above.
If the pencil marks are removed only on the side further away from the axle, then the blade will need to be adjusted closer to the axle using the steps described above.
If the pencil marks are not removed, or are removed evenly, then the blade is centered an no further adjustments are necessary.
メンテナンス
使用後はマシーンから削りカス等を掃除し必ず乾燥させてください。また定期的に刃とマシーンに損傷がないかを点検し、刃や車軸に少量のオイルを差すことで、マシーンを長持ちさせることができます。
安全上の注意
マシーンで使用される刃やまたリード製作に使われる刃は非常に鋭利で、怪我、またその他の損傷を引き起こす可能性があります。
事故を起こさないために、Reeds 'n Stuff の製品を使用する際は、マシーンの設置、使用、メンテナンスの際には、以下の安全に関する指示に従ってください:
Reeds 'n Stuff 製品は玩具ではありません。
したがって、お子様や身体的、感覚的、精神的な能力に制限のある方は使用しないでください。
Reeds 'n Stuffの製品は屋内での使用を目的としています。